
Last updated on 13 February 2025
Where I left off
At the time of my last post, I had just finished my Diploma at SAIT and all that entails. I delivered the last couple presentations, finished up the final projects, and was eagerly looking forward to what the future had in store for me following graduation!
Boy oh boy did I have no idea what the job hunt would look like, nor how busy I would be in the coming weeks following the diploma program completion.
Where I am now
Just after New Years, I was approached by an acquaintance to help setup some new firewalls and servers for their home business. This was, for all intents and purposes, meant to help me more than help them as this is a project that they are more than capable of completing. Needless to say I was ecstatic to be offered a project that would allow me to apply what I learned during my studies and gain some valuable experience in the industry.
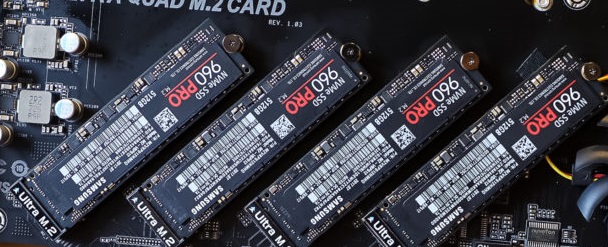
Without divulging into all of the specific details (for security purposes), they were looking for a firewall, and a RHEL Linux server with multiple roles configured in a RAID1 setup. RAID1, commonly known as mirroring is when you have multiple storage devices that act as a single one for redundancy.
What is RAID?
RAID is an acronym for Redundant Array of Independent Disks, and the number following is the specific configuration for the RAID level. The most common RAID levels are 0, 1, 5, 6, and even 10. The RAID level you use is dependent on a few factors:
- Desired functionality (redundancy, performance, or mix both)
- Amount of storage drives at your disposal
- Amount of physical space in the device
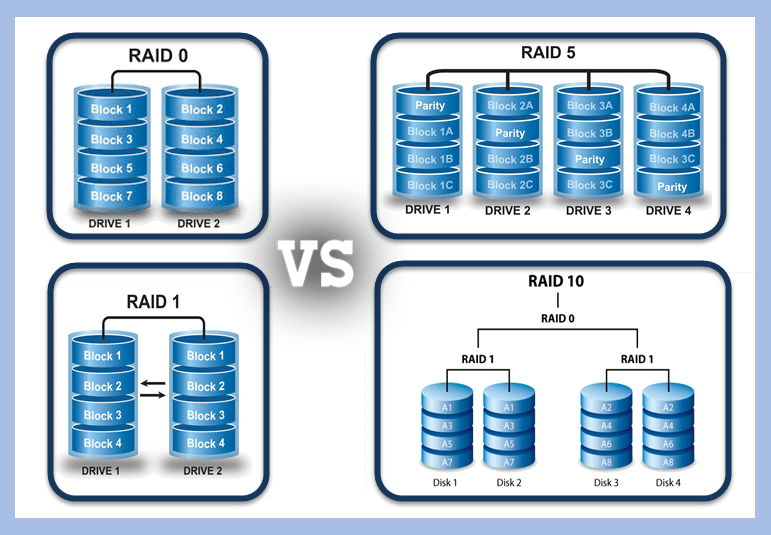
Each RAID configuration has a specific goal in mind. RAID0 utilizes ‘striping‘ when writing data. When writing data to a disk, there are physical limitations and capabilities of the disk that limit how fast the data can be transferred. This is why an SSD is so much faster than an HDD. When striping, the write speeds are effectively double because you can write data to both disks simultaneously. If you had to save a 100MB file, your system would save 50MB to one disk and 50MB to the other. RAID0 is all about performance, but if one of the disks fails, the data becomes corrupted and rarely can it be recovered.
RAID1 is the opposite. Data is written to both drives, but the data is replicated instead of being split. This is called ‘mirroring‘ RAID1 does not provide a performance boost that RAID0 does because the data copied to each disk isn’t reduced. When saving that same 100MB file in a RAID1 configuration, the data in its entirety is saved twice; once to each disk. RAID1 is invaluable for data redundancy and availability because if one drive fails, the data still exists on the other drive, allowing you to replace the failed drive and continue on like nothing ever happened.
The other RAID configurations function as variations of RAID0 and 1, but under the hood operate differently by utilizing something called ‘parity‘. Parity is not a direct copy of information, but instead can be thought as containing instructions on how to recreate lost data. In the math equation 2 + 3 = 5, if you suddenly lost either the 2 or the 3, you can work backwards by using the solution to find the missing value (Ex: 5 – 3 = 2). Parity works similarly to this. RAID 5 and 6 require a minimum of 3 and 4 drives respectfully, and allow for the striping performance benefits while allowing for disk failures without data loss. RAID5 needs a minimum of 3 disks (2 for storage, 1 for parity). You get some performance gain from having the striping functionality, while still having a failsafe. In RAID5, if both main disks fail, the RAID collapses. RAID6 is similar to RAID5, except that it has a minimum requirement of 4 disks (2 for storage, 2 for parity). This allows 2 main disks to fail before data is lost.
Finally, RAID10 is a direct mix of RAID0 and RAID1. The configuration name comes from RAID(1+0), and requires a minimum of 4 disks. In summary, RAID10 is 2 separate RAID1’s contained within a RAID0, meaning one disk from each of the RAID1’s can fail safely without issue. Compared to RAID6, this might seem like a downside, because both disks from a single one of the RAID1 setups fails, then the RAID10 collapses. The main benefit to running RAID10 is its quick rebuild time because data is mirrored. RAID6 and RAID5 use parity, which takes more time because the parity disk works in tandem with the remaining functional disk(s) to rebuild the information on the disk that was lost from scratch instead of from a direct copy.
Why use RAID1?
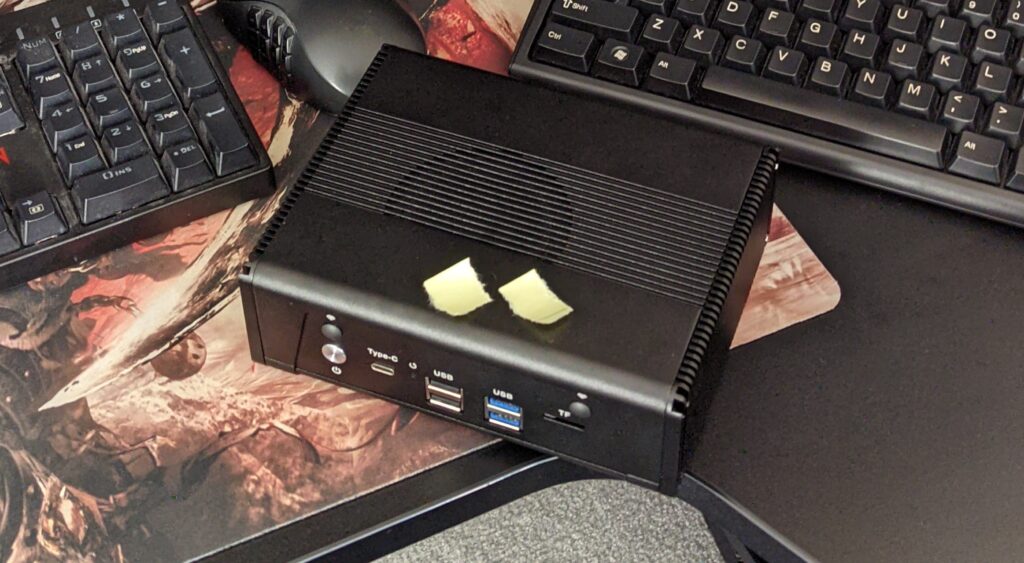
For this setup, we used RAID1, because we needed redundancy, have the minimum required drives (2), and don’t have the space for more drives since the server units themselves are very small. RAID1 is designed for redundancy of information, meaning that there is a failsafe in the event of drive failure. In a RAID1 configuration with 2 drives, you effectively only have the total storage of 1 of the drives, because the information is copied and put onto the second drive every time information is written. At first, this seems like a waste because you’re only using half the total capacity of the drives together, but the strength of RAID1 lies in that setup. In a RAID1 configuration with 2 drives, if a single drive fails, the second drive kicks in and normal operation resumes without issue.
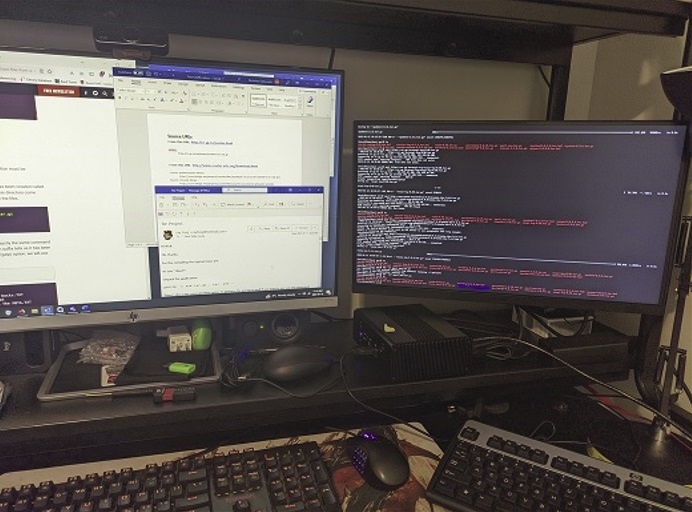
Ignore the sticky notes; had to keep track of multiple devices somehow
This is not something that is needed for your average user with a laptop for home use, but for business use, this can mean the difference between uninterrupted normal business operation, and your business being rendered offline because the storage drives of the server failed. This can save a lot of time as you can replace the failed drive and integrate it into the existing RAID, instead of potentially losing all of your data and having to work through a lengthy redeployment process. Not only that, but business have an obligation to store and protect data from customers and clients, and data loss can pose an issue in the event of an audit.
First steps: install the OS and mirror the boot and EFI partitions
Installing the OS onto one of the drives is something that I have done numerous times throughout the course of the diploma program. After installation, I cloned the partitioning scheme so it was identical on both drives and laid the groundwork to mirror the /boot and /efi partitions.
I wish I could say it went smoothly from that point on, but that would be a lie. After mirroring the /boot the /efi, partitions, the servers would no longer boot. Restarting the project to get a bootable device was something that occurred frequently, but eventually digging around for solutions led to reinstalling the grub2 bootloader with EFI compatibility after initializing the RAID1 partitions. After that, the server booted properly and I could continue the deployment!
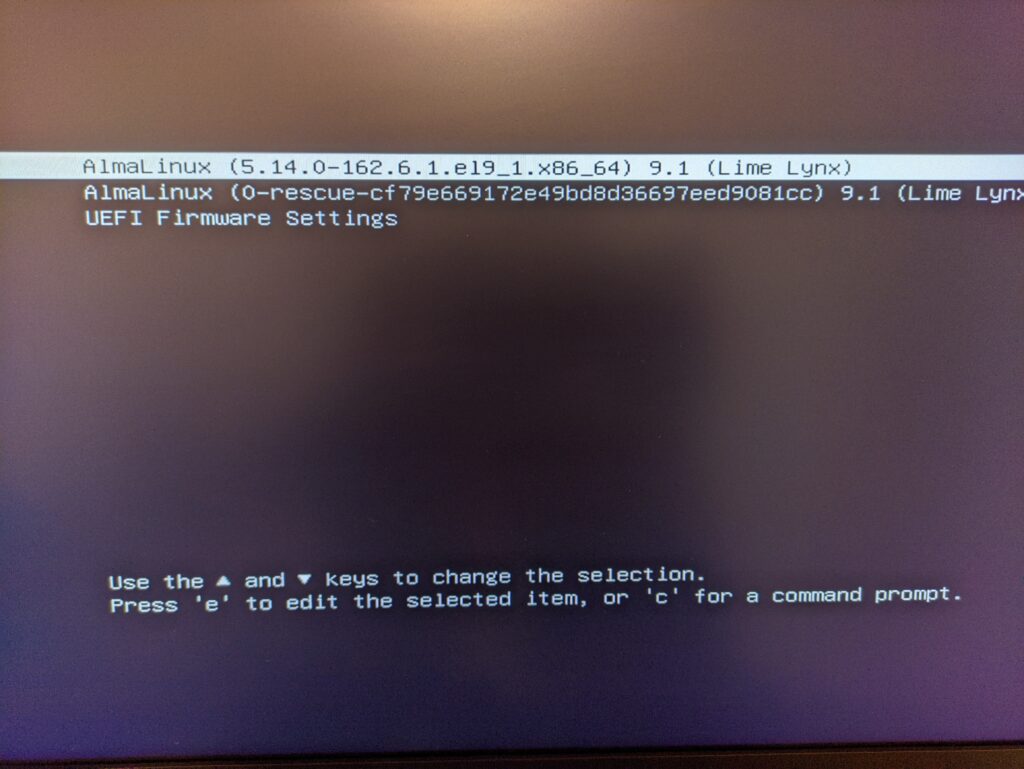
This was a huge relief, as without a functioning grub2 (or another bootloader) the device itself cannot boot at all, and is rendered useless. RAID1 is tricky for systems to boot from without a boot manager program as the multiple disks are designed to appear as one single drive and BIOS often has trouble recognizing it. This is also important if one of the disks were to fail, the grub2 loader can boot from either of the disks in the event of failure.
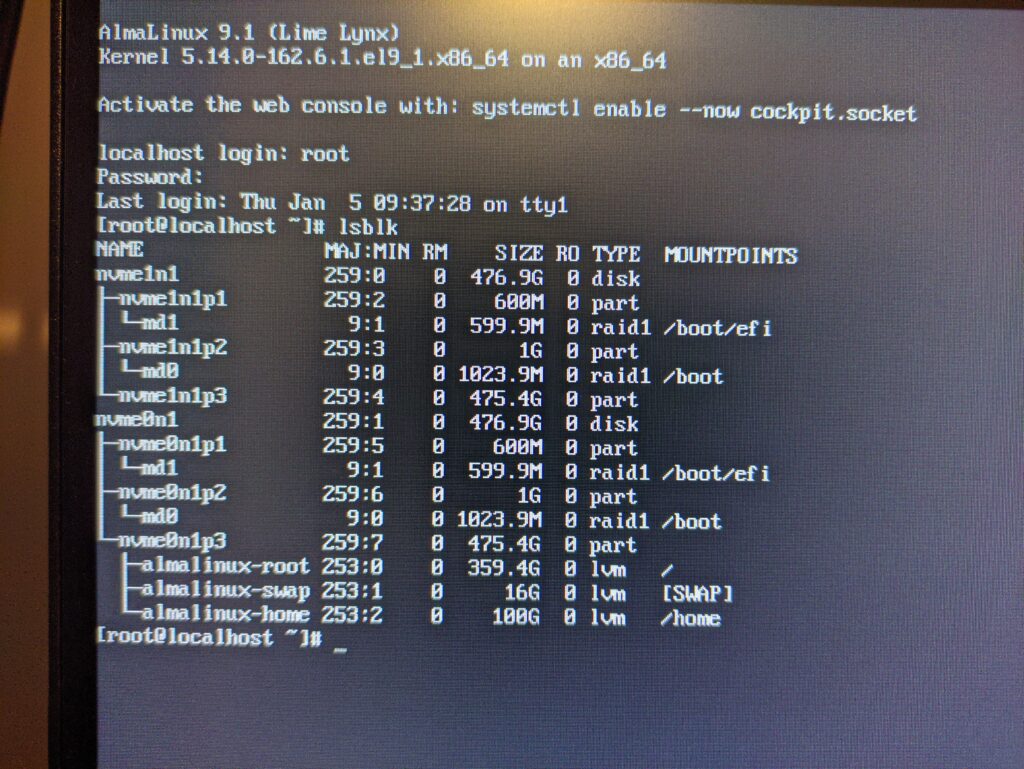
What you see above are the 2 installed drives (nvme0n1 and nvme1n1), each having the /boot and the /efi mountpoints in a RAID1 configuration. With those partitions out of the way, the next thing on the list is to get the root (/), /home, and SWAP partitions mirrored too.
Next stop: Mirroring the rest using LVM
Next step was to then mirror the other partitions created during the install. Using LVM, I created physical volumes, volume groups to incorporate those physical volumes, and finally the logical volumes for the /home, root, and the swap partitions that were created during the install. The issue that I ran into was in order for a volume group to be extended to incorporate a second drive, there has to be some additional space on the original drive to keep logfiles for the LVM configuration. Because downsizing partitions is a very delicate process that doesn’t always work, the best solution was to restart again, but this time don’t allocate all of the remaining space on the drives to the root directory and save a tiny bit for the LVM logfiles.
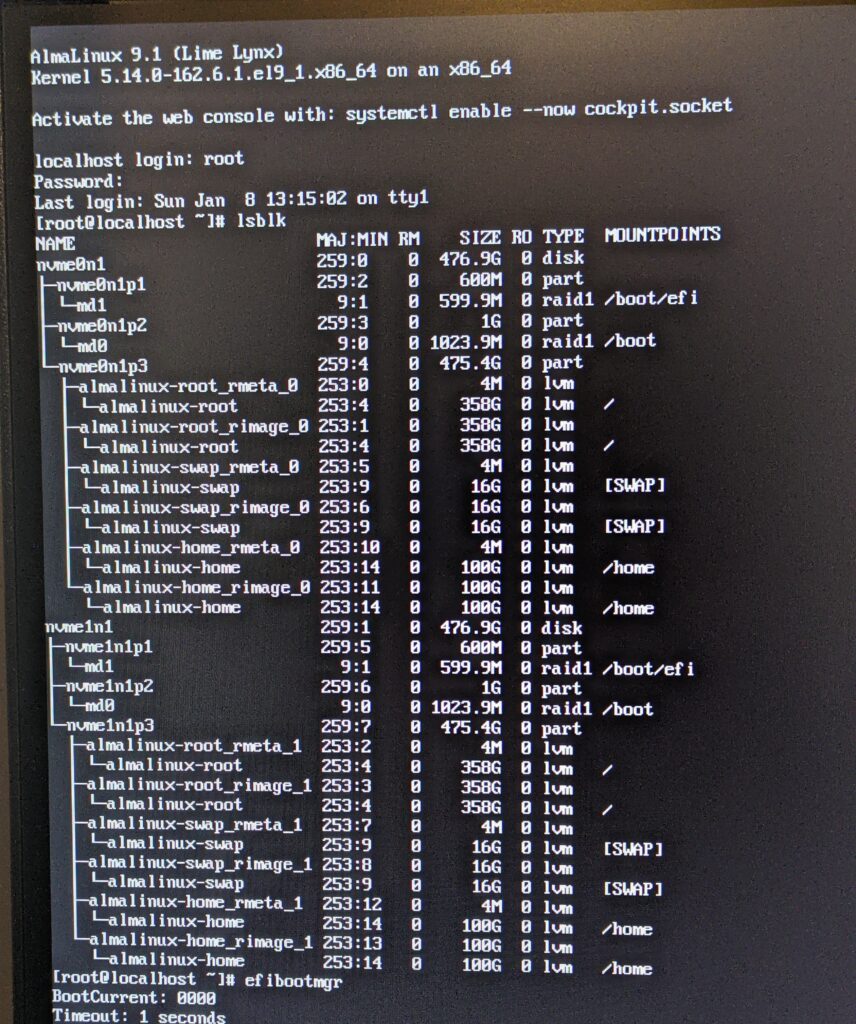
Reinstalling with that in mind, the rest of the setup process worked without issue! The end result was a server where the entirety of the first storage device is mirrored onto the second one, and either can be booted from in the event of a drive failure. The screenshot above seems complicated at first glance, but you can see that the partitions of the nvme0n1 and nvme1n1 disks are identical. Effectively, if one of the disks were to fail, the system will still boot and function solely with the other. For business continuity, this is a really good place to be and as long as you monitor the hardware to catch a failure if/when it happens, gives you ample time to replace the failed drive without interruption to your business operations.
Conclusion
Working on this project has given me some of the real world experience that I have been craving during the final stretch of the diploma program. It has helped teach me how to take a step back and find solutions to problems, while also working towards a goal based on a real clients needs. I am happy I managed to get this up and running for the client, and have gained valuable experience I can apply to working with this type of setup in the future. Looking forward to see what other opportunities I find!
Thank you for reading!